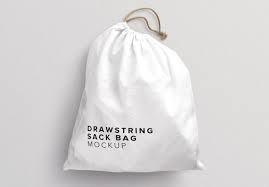
To understand how to create custom drawstring bags, it’s essential to know why they’re helpful. As the name implies, these bags have a drawstring that pulls the opening closed, making them easier to carry than loose-fitting bags or those with zippers or other fasteners.
They can also be made in any shape or size you want to use them to package gifts, store books and binders, or even hold trash if you make it large enough. Custom drawstring bags are more versatile than most people realize.
Decide on the design
Before designing your drawstring bags, it’s essential to decide what kind of design you want. A classic drawstring bag is perfect for carrying sports gear, books, or camping supplies. You could also use a custom drawstring bag as a gift bag or a party favor. If you’re looking for something more modern, plenty of graphic-heavy designs are available online.
Take some time to choose your favorite design and ensure it will translate well onto fabric. Remember that darker colors may require multiple passes through an inkjet printer to get good results. It’s also worth testing your design before going all out with a print run.
Determine Measurements and Size
How big will it be? If you want a specific size, use a tape measure to determine that at its longest and widest points. You can make your bag bigger by adding more panels. Keep in mind that it will get more comprehensive as well.
If you want it finished with plastic lining or trim, factor those measurements into your cutting plan. You might have different sizes depending on what kind of drawstring bag design you choose to keep notes, so you don’t forget later.
Sew the Bag Body
Place your fabric over a table or any firm surface, and fold over your bag top section. You’ll want to make sure that there is one even-sized piece of fabric here about two times longer than you want your bag’s finished length. It helps if you have a straight edge for folding like a long ruler or yardstick.
If you don’t have one lying around, get creative by drawing a straight line down with a pencil and then folding it over along that line. Your final piece should be twice as long as it is wide. Now that you have your folded fabric in front of you, mark off even sections along its side using tailor tacks or safety pins.
Fold Over and Sew Bag Top Section
Once you’ve cut out your bag top and have folded it over, be sure to sew it shut just as you would with any other fabric. If possible, reinforce it with a few cross stitches so that it won’t fray. Since drawstring bags are generally more prominent than standard bags, consider using thicker thread, so the stitching doesn’t show through.
It will also ensure that your seams will hold up over time. Drawstrings should be approximately 2 inches shorter than your bag height. If your bag is 10 inches tall, allow for 8 inches of the drawstring. You want enough room for about two fingers underneath when filling your bag with its final contents.